
How to Prepare for a Portrait Study Evening with Window Light
A practical walk-through for members: what to bring, how to place a willing neighbour near a window, and how to read the light so the portrait feels honest.
Luc Tremblay · · 7 min read
Start with the window, not the camera
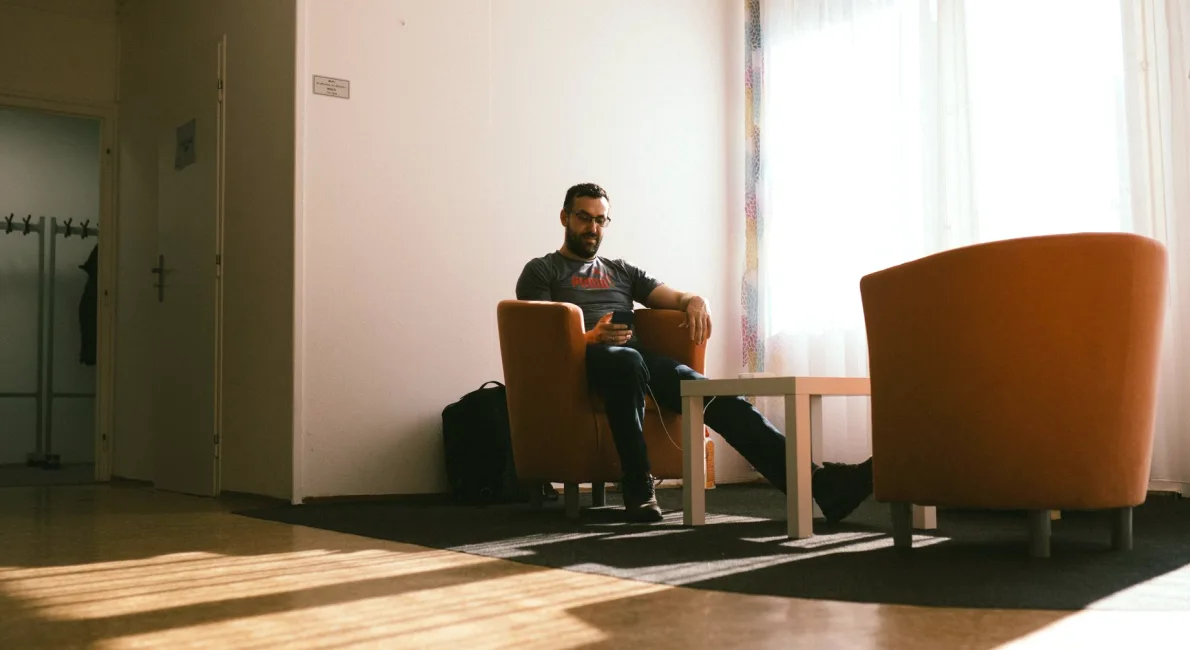
Before anyone lifts a camera at a Portrait Study Evening, we spend a few minutes just looking at the window. I ask members to notice where the light enters, how soft its edge is, and how it falls across a wall or a face. In mid autumn the sun sits lower, and even an ordinary afternoon window gives a gentle, directional glow that flatters without any equipment at all.
Stand where your subject will sit and turn slowly. You will see one side brighten and the other settle into shade. That difference is your portrait. Resist the urge to switch on lamps, because mixed light tends to colour skin in ways that feel unfamiliar to the person you are photographing.
If the room has sheer curtains, leave them drawn across. They soften harsh patches and spread the light evenly, which suits newcomers who are still learning to judge exposure by eye.
Take a quiet moment too to check what is behind the chair. A plain wall or a bookshelf works well, while clutter pulls attention away from the face.
- Look at the window before placing the chair
- Leave sheer curtains drawn to soften the light
- Switch off lamps so the colour stays consistent
Placing your sitter and finding the light
The classic arrangement is simple: seat your neighbour at an angle to the window, about an arm's length away, so the light wraps around one side of the face. Ask them to turn slightly toward it. If the shadow side feels too deep, a sheet of white card or a pale wall opposite will bounce a little light back without looking staged.
I usually suggest starting with a three-quarter pose rather than a straight-on one. It feels less like a passport photograph and gives the face more shape. Move the chair a few centimetres at a time and watch how the catchlights appear in the eyes; small shifts change the mood more than most settings on a camera.
Keep your own position flexible. Step closer, step back, crouch a little. Members often discover that the best frame sits just beside where they first planned to stand.
Check the shadow under the nose and chin as you adjust. If it falls too heavily, turn the chair a touch toward the glass until the face reads clearly.
- Seat the sitter at an angle, an arm's length from the glass
- Use white card to lift the shadow side
- Try a three-quarter pose before a straight one
Choosing settings you can trust
Window light changes as clouds pass, so settings need some patience. I encourage members to set a low sensitivity to keep the image clean, then choose a shutter speed fast enough to hold a steady hand, usually around one sixtieth of a second or quicker. If the room is dim, raise the sensitivity a step rather than risk a blurred face.
Expose for the brighter side of the skin and let the shadow fall where it will. Many beginners brighten everything until the portrait looks flat, losing the quiet drama that makes window light worth using.
Shoot a few frames, check the screen, and adjust once. Constant fiddling distracts both you and the person in the chair. If you are working with a phone, tap the face to set focus and drag the exposure slightly down for a truer tone.
Keep the focus on the eyes nearest the camera. A slightly open aperture softens the background gently, but not so far that the nose and ears drift out of sharpness.
- Keep sensitivity low and the shutter fast enough to hold steady
- Expose for the bright side of the face
- Focus on the eye nearest the camera
Putting a willing neighbour at ease
Most people feel awkward being photographed, and that discomfort shows. At our evenings we pair members with neighbours who have agreed to sit, and we talk first, before any pictures. Ask about their day, the street they live on, something they enjoy. A relaxed conversation does more for an honest portrait than any direction about posture.
Tell your sitter what you are doing and why. Show them the screen after a few frames and ask whether they are comfortable. Consent is not a single question at the start; it continues through the evening, and a person may change their mind about how they wish to be seen.
Leave pauses. Some of the best frames arrive in the quiet seconds after a laugh, when the face softens and the person stops performing.
Offer a drink of water, a cushion for the chair, a moment to stand and stretch. Small kindnesses show in the pictures, and neighbours are far more likely to sit for you again.
- Talk before photographing
- Check in on consent throughout the sitting
- Wait through the quiet moments after laughter
What to bring and how the evening runs
Bring a camera you know how to operate, whether a phone or something more involved, plus a spare battery and a card with room to spare. A small piece of white card, a clip to hold a curtain, and a notebook for jotting down what worked are all useful. We provide chairs, a bright room and a few reflectors.
The evening begins with a short talk on light, followed by paired sittings in which each member takes a turn behind the camera and in front of it. Sitting for someone else teaches a great deal about how it feels to be photographed.
We finish by gathering around a screen and looking at a few frames together, speaking kindly about what the light is doing in each one. Nobody is expected to arrive skilled; curiosity is enough.
Wear plain, comfortable clothing if you expect to sit, since busy patterns pull the eye from the face. Arrive a little early so the room's light can be studied before the first pairing begins.
- Camera, spare battery and a roomy memory card
- A small piece of white card and a notebook
- Plain clothing for those who will sit
Reviewing your frames afterward
When the evening ends, the learning continues at home. Go through your frames slowly and choose the two or three where the light felt right and the expression felt real. Ask yourself what the window was doing, where the shadow fell, and whether the person looks like themselves.
I suggest keeping notes beside each favourite: the distance from the glass, the time of day, the settings used. After a few evenings these notes become your own small reference, far more useful than any rule from a book.
If you print your favourites, bring them to a review night. Seeing a portrait on paper reveals things a screen hides, and friendly comments from fellow members help you see your own work afresh.
Share a print with your sitter if they wish it. A portrait made with care is a gift, and handing it over closes the circle that began with a conversation at the window.
- Choose two or three frames, not twenty
- Note distance, time of day and settings
- Offer your sitter a print if they would like one
Window light asks very little of us: a chair, a patient eye and a person willing to sit. The craft lies in noticing, in moving a few centimetres, and in treating the sitter with care. Come to a Portrait Study Evening with a camera and curiosity, and you will leave with portraits that look like the people in them, made in the ordinary light of a Canadian autumn afternoon.